Cleaning, conserving and preparing the skeleton of Warwick Museum’s Wilmcote plesiosaur,
plus CT scanning the skull for research and moulding the whole skeleton to produce a painted cast for display, Nigel Larkin 2015 - 2016.

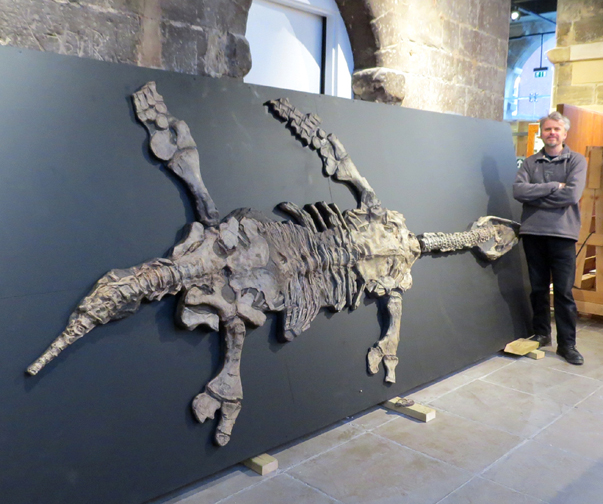
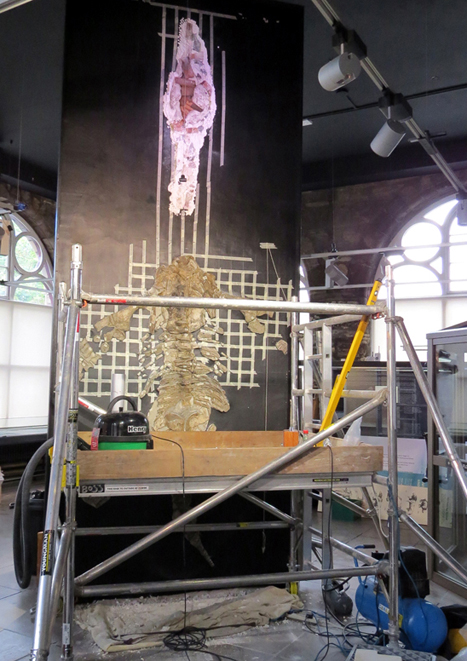 Warwick Museum had to close in 2015 for a major phase of redevelopment.
As part of this project, the large (4.5m long) plesiosaur skeleton from Wilmcote (left) needed to be taken down and stored off site to keep it safe during the
building works. The specimen needed to be cleaned, conserved and have moulds made of all the bones so that a painted cast could be put on display.
The dismantling of this large, heavy, fragile, old and scientifically important specimen is described here:
http://www.natural-history-conservation.com/wilmcoteskeleton.htm
Warwick Museum had to close in 2015 for a major phase of redevelopment.
As part of this project, the large (4.5m long) plesiosaur skeleton from Wilmcote (left) needed to be taken down and stored off site to keep it safe during the
building works. The specimen needed to be cleaned, conserved and have moulds made of all the bones so that a painted cast could be put on display.
The dismantling of this large, heavy, fragile, old and scientifically important specimen is described here:
http://www.natural-history-conservation.com/wilmcoteskeleton.htm
You can find out more about the specimen's context and history on these three pages:
http://heritage.warwickshire.gov.uk/museum-service/collections/warwickshires-jurassic-sea-dragons/
http://www.ourwarwickshire.org.uk/content/article/the-wilmcote-plesiosaur
http://palaeo-electronica.org/content/2015/1146-plesiosaurus-megacephalus_2
As this specimen is thought to be a new species of plesiosaur, the skull is quite important and cleaning it for study was a priority.
The side of the skull that had been embedded in plaster for over 100 years had not been photographed or described before so it was particularly
important that as well as cleaning the skull to remove the old plaster, paint and glues the original Jurassic rock
should be removed as far as possible to facilitate the study of the bones.
Condition of the specimen: As displayed, this skeleton was lying on its back ‘belly-up’ (see image to the left) so that the underside
of the skull and mandible were exposed.
The dorsal surfaces of the skull and mandible were embedded in plaster that held the specimen to the wall.
Cracks had developed in this plaster and the specimen was no longer secure.
When the specimen was removed from the wall there were cracks running through the skull along old joins that had failed because they were simply
filled with plaster (possibly over a hundred years ago). In fact there were sections where portions of the skull had not been preserved and plaster had been used to fill the gap.
The posterior half of the skull block comprised one section, and the anterior half of the skull was in three sections.
The skull was either exposed to erosion during burial or when excavated, or to poor preparation in the past - or both - with the top of the
‘snout’ (the underside as found) having a degraded surface compared to much of the specimen. Also, many of the teeth have been badly damaged, possibly during excavation.
After removal from its old plaster display frame, the dorsal surface of the skull was still covered in plaster of paris and some mortar with a ‘tide line’ of paint on the bone
surface along the edge of the plaster, from where the plaster surround had been painted various colours in the past.
The plaster, mortar and paint had to be removed carefully so that the specimen was clean and ready for re-display and so that
the real dorsal surface of the skull could be revealed and then prepared for study - as much matrix as possible was to be removed
to expose as much bone as possible without endangering the integrity of the skull.
The whole specimen is so flat and ‘thin’ that if too much matrix was removed the specimen would become too fragile for its weight and could break up.
Cleaning and preparing the skull: The bulk of the plaster was carefully removed with a pneumatic preparation needle,
followed by cleaning with an airbrasive unit utilising compressed air and a gentle powder, sodium bicarbonate.
This removed all traces of the plaster and the paint, leaving a clean bone surface.
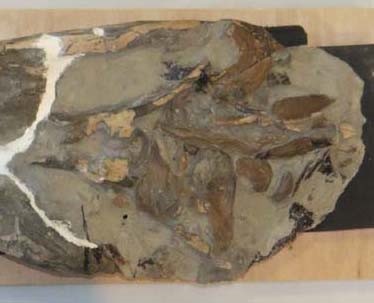
The anterior portion of the skull is completely exposed and there was no matrix on this portion.
The posterior portion of the dorsal surface of the skull was covered with matrix. This was removed as far as possible to reveal the surfaces of
bones preserved within the matrix. The matrix was very hard in places and it took a lot of effort with the preparation needle
and airbrasive unit to expose the bones. In many places the preparation had to stop short as the matrix was getting so thin.


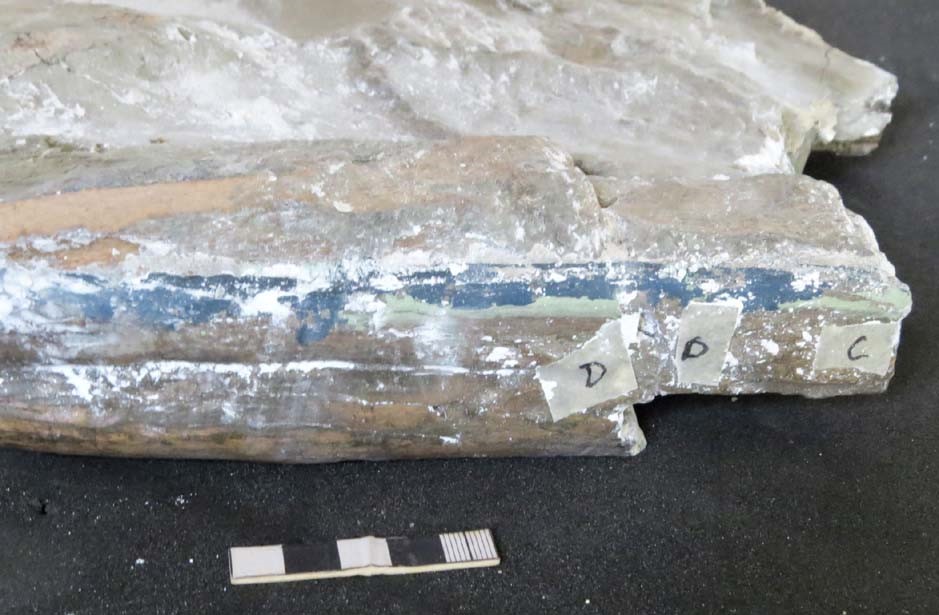

Above: recording the exact layout of the specimen prior to dismantling; the anterior tip of the skull with plaster and mortar still attached;
the same piece after cleaning; the ‘tide line’ of various colours of
paint along the edge of the skull; the dorsal surface of the posterior portion of the skull before cleaning and preparation; the dorsal surface
of the posterior portion of the skull (the same section as the previous image but taken from a slightly different angle) after cleaning and preparation.
Rebuilding the skull: The pieces of the specimen were glued back together with the reversible conservation adhesive Paraloid B72 after the edges
of breaks were consolidated with Paraloid B72 consolidant in acetone (at 10%). The gaps where pieces of bone were missing
were filled again with plaster of paris. All the bone surfaces were treated with Paraloid B72 consolidant in acetone (at 5%)
first to consolidate friable surfaces, bring the natural colour back to the specimen and to provide an easier surface to keep clean in future.
The specimen is heavy but quite thin (see below) and with several old breaks which whilst repaired still present weaknesses, especially the
plaster-filled gaps and therefore has to be handled with extreme care. It will break in two (at least) if poorly handled.
CT scanning:To reduce the need for handling the specimen in the future, to enhance its potential use in current and future
scientific research and to benefit future displays of the specimen,
the opportunity was taken to CT-scan the newly cleaned, conserved and prepared skull at the Royal Veterinary College, London.
This was really successful and the images are currently being used to describe the specimen as a new species.

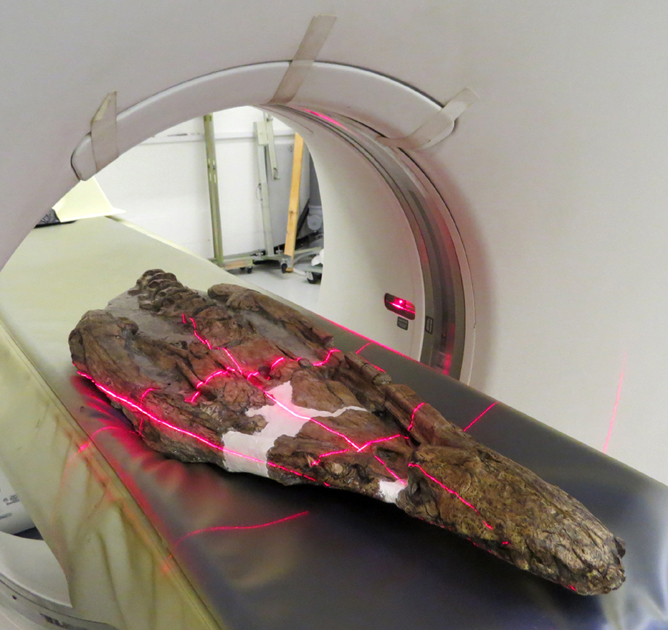
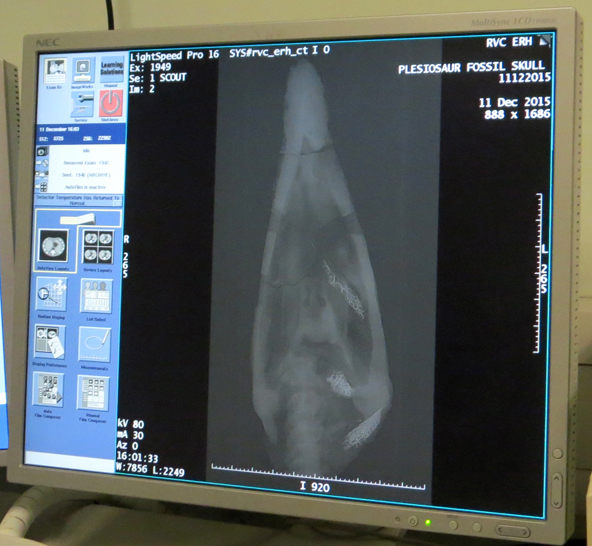

Above: The skull being CT scanned at the Royal Veterinary College (with thanks to Jonathan Dixon and Renate Weller).
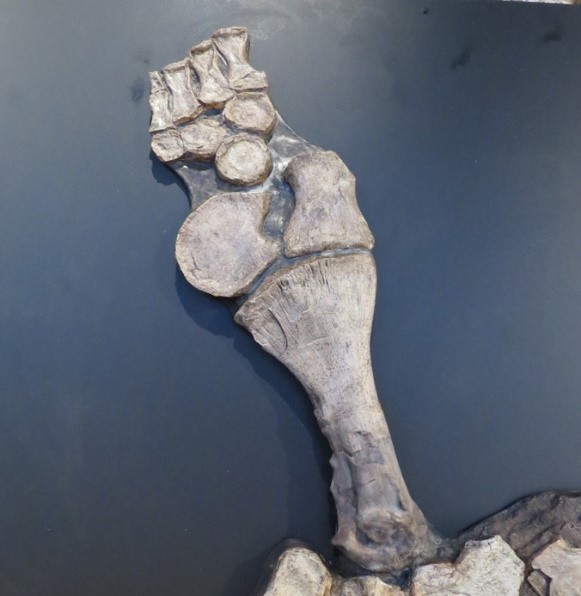
The postcranial material: The rest of the skeleton was cleaned, consolidated and where necessary glued back together using the same techniques and materials used on the skull. The whole specimen had to be quite heavily consolidated with Paraloid B72 in acetone to protect the surfaces of the bone and matrix from the moulding process, as a cast of the whole skeleton was required for display.
Moulding, casting and 3D printing to make a replica of the whole skeleton: The cleaned and consolidated bones of the skeleton were laid out in asociation
on a large flat surface so that the upper surfaces and sides of the specimen could be moulded. The undersides did not need to be moulded as the specimen was to look like it was embedded in plaster, as before. This also meant that the specimen did not have to undergo the risk of being turned over halfway through the moulding process which would have endangered the fossil and disrupted the association of the pieces.
To prepare the specimen for the moulding process all the cracks and gaps had to be filled to prevent the moulding rubber from penetrating the fossil when it was applied. If this was not done and the rubber had penetrated the cracks, gaps and holes and then set, during the de-moulding process the mould would tear in some places, leaving rubber behind in the specimen and in other places it would break the specimen apart and the rubber would take pieces of the fossil with it. Most of the gaps were filled with reversible water soluble putty.
The moulding medium used was silicone rubber, with the rigid portion of the moulds made from acrylic resin and woven glass fibre.
The proximal half of the right femur (left as displayed) had been missing for some time (since at least 1974, according to old photographs).
It used to be present and attached to the rest of the skeleton as indentations in the original plaster backing showed that the bone had once been embedded
there. But there was no record of what had happened to it. Therefore the complete right femur (as displayed) was 3D-scanned, the data mirrored and
the appropriate portion of the proximal half was 3D-printed. This 3D printed model was placed adjoining the distal half of the bone (as shown below)
and was laid-up ready for moulding so that a complete cast of the limb could be made. Steven Dey of
ThinkSee3D undertook the scanning and 3D-printing work.
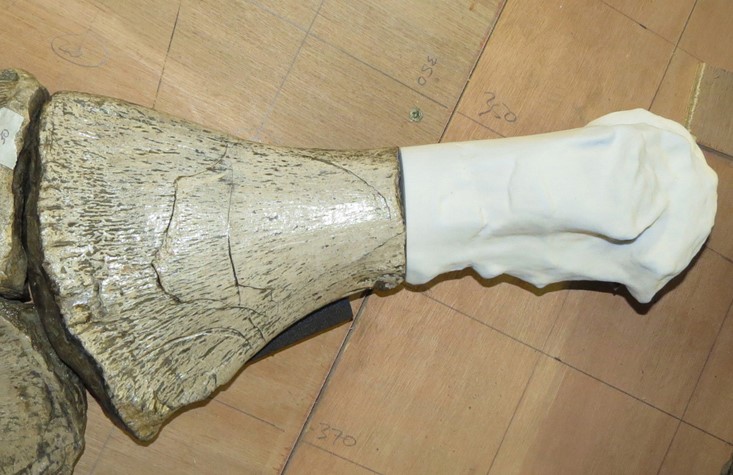

Left: The left femur (as displayed) with the 3D-printed model of the missing proximal portion.
Middle: The completed rear ‘left’ limb (incorporating a cast of the half-bone and half-3D printed femur).
Right: A portion of the abdomen boxed-up ready for transport and storage.
After demoulding, the water soluble putty was removed from the various sections of the skeleton and matrix and the material was cleaned.
Transport crates were made for sections of the specimen out of Plywood, lined with Plastazote foam.
Plastzote foam was also glued in place (to the foam or to the wood) to hold the bones in position so they did not move during transport.
The silicone rubber moulds were used to make casts out of acrylic resin and fibre glass.
These casts were painted to approximately match the fossil, using artists’ acrylic paints.
The weight of the resin and fibreglass casts totalled about 35 kg.

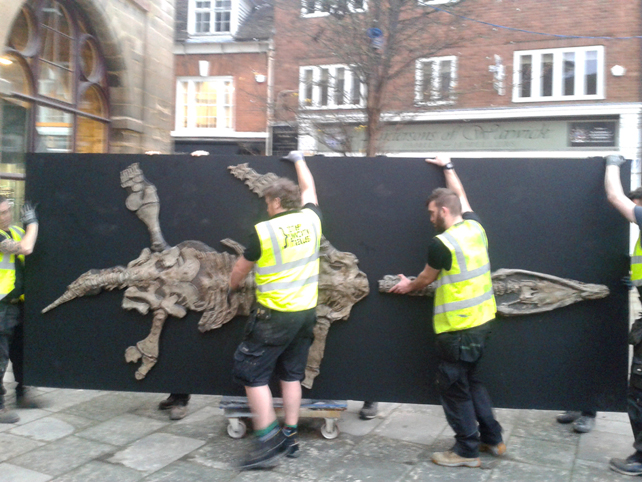
Above left: Painting the cast. Above right: Delivering the cast on its wooden mount.
Below: The painted cast of the skeleton on its wooden frame, delivered safely to Warwick Museum.
For more details about what we can do for you, or for a quote, please
contact:
enquiries@natural-history-conservation.com
We
are members of the Institute of Conservation.