Making replicas of rhino horns and attaching them to taxidermy specimens on display at the Powell-Cotton Museum, Quex Park.
Previous replica horns were stolen from these two rhinoceros taxidermy specimens located in a large diorama at the
Powell-Cotton Museum at Quex Park in Kent. Therefore new replicas needed to be made and attached securely.
New casts of suitable rhino horns were made from existing moulds using Jesmonite acrylic resin and glass fibre.
Before installing these replicas the rhino heads were wrapped gently in cling film (and with some newspaper and masking tape, see photos below)
to protect them and keep them clean. The ‘stumps’ of the horns were prepared so that there was a suitable surface for the replicas to be attached to.
This required the light consolidation of the damaged stump area, using Paraloid B72 in acetone at 10% (Paraloid B72 is a reversible methacrylate co-polymer, widely
used by conservators) which also acted as a barrier layer between the stump and the resin that would be used to attach the replica horn.
In the case of the ‘wallowing’ rhino three long screws were screwed through the existing plaster and into the wood below, so that
the resin applied next would have more to grip to.
Jesmonite acrylic resin was mixed with pigments and a thixotropic additive to stiffen the mixture enough so that it did not run down the face of the rhino,
and some strips of glass fibre matting were mixed in. Then the mix was inserted into the base of the replica horn. This was then positioned on the stump in the
correct position and the resin and glass fibre mixture oozed from the base of the horn and onto the prepared area of the horn stump, enveloping the screws as it did so.
The horn was held in position until the resin set, making sure that no resin flowed out of the stump area and onto the surface of the specimen.
An area around the base of the horn required filling-in and modelling so that the junction between the replica horn and the taxidermy specimen
looked natural. This was undertaken at first with Jesmonite resin with glass fibre strips and was finished-off with plaster of paris –
both had suitable pigments added to give an approximate base colour. The final layer of plaster of paris was modelled-in to give a suitable surface texture,
and was then painted with acrylic artists paints to match the taxidermy specimen.
The only way in which the process differed between the two specimens is that the larger rhino - standing on the floor and not wallowing - did not require the screws as two
metal rods were already sticking out of the stump (see photos below), and it also had a larger area of modelled-in join.
1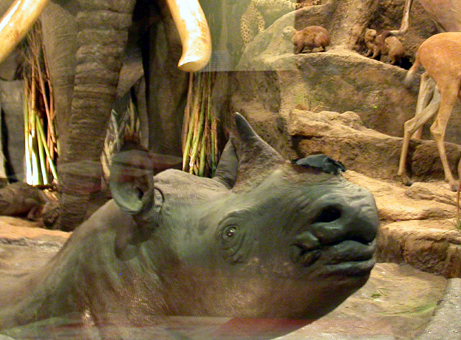 2
2 3
3
4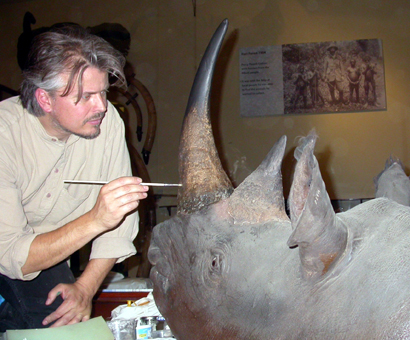 5
5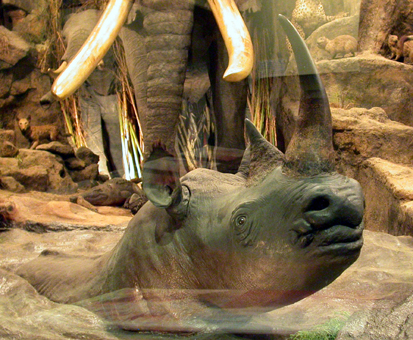 6
6
1: The rhino without a horn. 2: Protecting the specimen. 3: The new replica horn attached. 4: Painting the horn and the modelled join. 5 & 6: The rhino after work was complete.
Working on the larger, standing, Northern White Rhino
1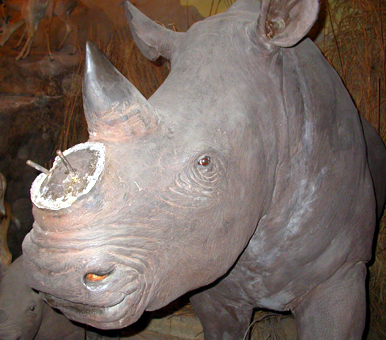 2
2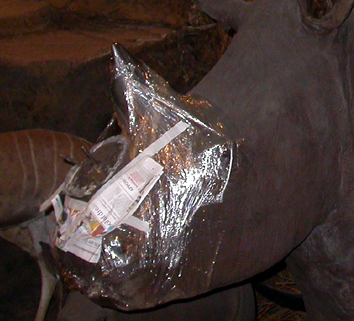 3
3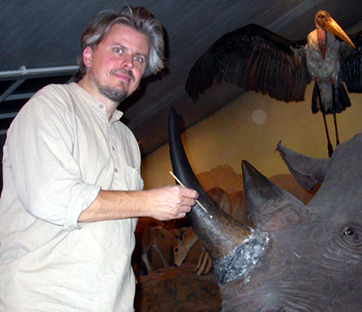 4
4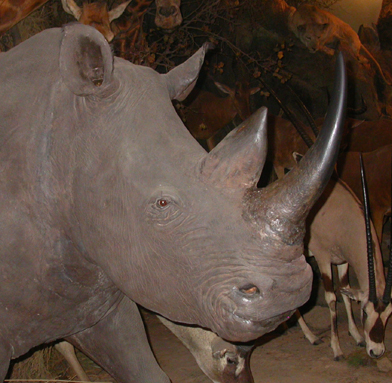
1: The rhino without a horn. 2: Protecting the specimen.
3: Painting the horn and the modelled join. 4: The rhino after work was complete.
For more details about what we can do for you, or for a quote, please
contact:
enquiries@natural-history-conservation.com
We
are members of the United Kingdom Institute for Conservation of Historic and
Artistic Works