Cleaning, repairing and rebuilding a large broken Aepyornis egg
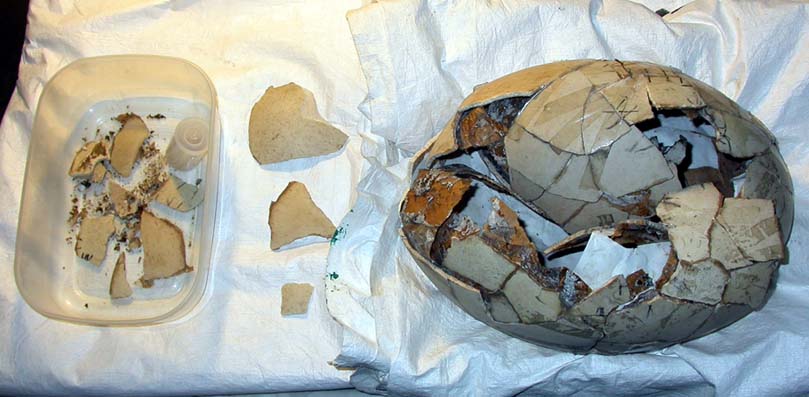
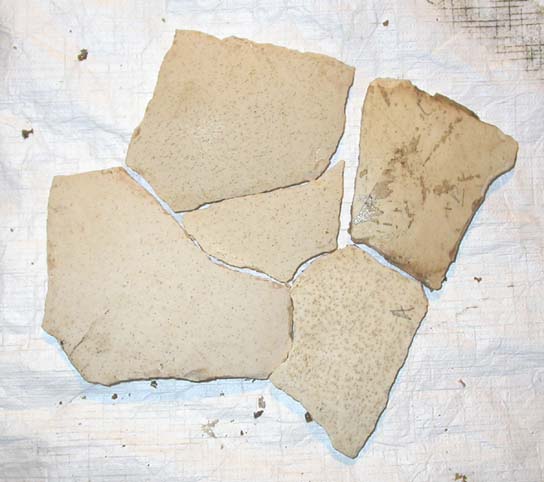
This large ancient Aepyornis egg, consisting of over 120 fragments from more than one original shell, had undergone collapse and many pieces were separate (see images above).
It was held together on the inside with photocopy paper and old brown parcel paper glued to the inside of the shell. On the outside lots of old strips of sellotape
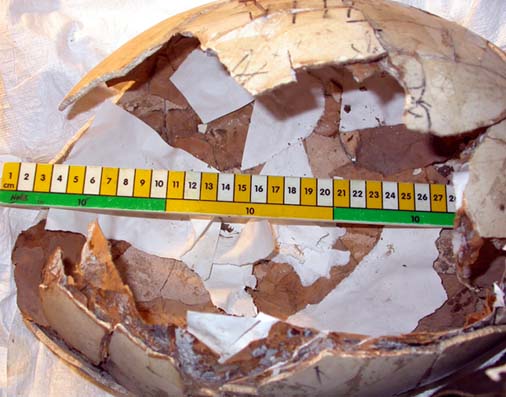
held various pieces in place (see image below). The surface was dirty, and had old unsightly brown glue applied liberally to the edges of the fragments.
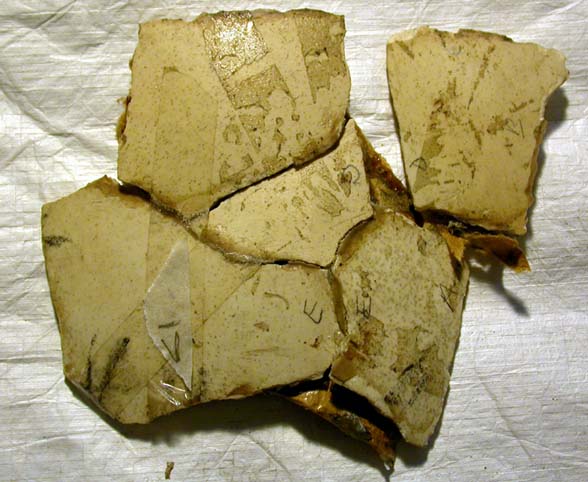
Lots of black pencil or crayon had been used previously to mark pieces to keep track of which bits went where. The individual fragments needed to be cleaned of the
sellotape (which left behind its glue), the dirt, the old glue and the crayons. The pieces needed to be stuck back together with reversible conservation materials
and techniques, not just because this is best practice but because this would enable the egg to be dismantled and put back together again, or at least adjusted,
during the painstaking rebuilding process.

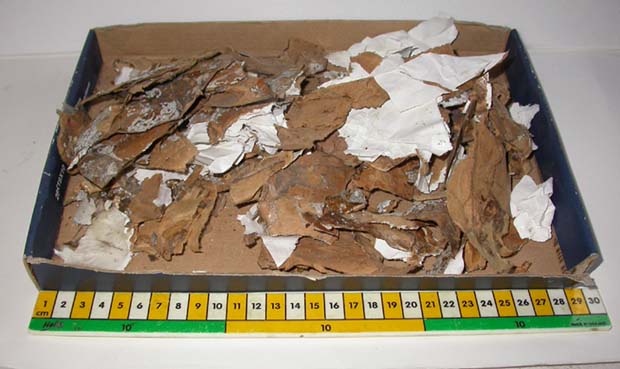
Left and far left: sellotape, old sellotape glue and crayon markings to be cleaned. Right: the same pieces as in the image to the left, partway through cleaning. Far right: non-archival paper removed from the inside of the egg.
Old paper and sellotape was removed with scalpels and tweezers. Then individual pieces of the egg were cleaned with a mixture of Synperonic A7
(a mild museum conservation detergent) diluted in warm water and applied with cotton wool swabs. This was then cleaned off with cotton wool swabs dampened with just
clean water. The glue of the selloptape stubbornly remained on the surface, as did the black crayons but rubbing the shell gently with an eraser removed almost all traces of both.
Scalpels were used to remove the old stubborn brown adhesive that had been used to join the fragments previously.
Once clean, pieces were glued together where joins could be found, using conservation grade Japanese tissue paper and neutral ph paper adhesive,
applying it to the rear of the fragments with a brush. This took a long time to set but it has the advantage of being archival quality (so it should not degrade easily)
and it can be softened if need be by the application of water – useful when corrections were required to the three dimensional shape later on.
As much old paper was removed from inside the shell as possible (see above) and Japanese tissue paper was glued to the inside of the largest pieces of the egg,
made up of many fragments. This would hold all the pieces together. The shape of this portion of the egg was maintained by gluing-in thin wooden batons across
the interior of the egg, in several directions (these were held in place with Japanese tissue). This was done repeatedly as the egg was built back up from all
the cleaned fragments.
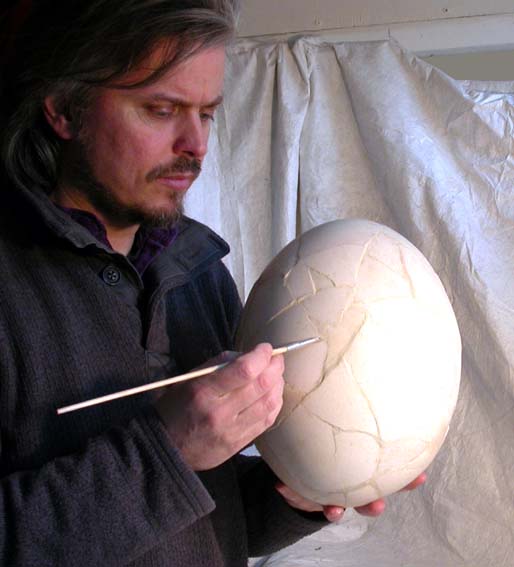
As the egg took shape, plaster of paris was used to fill in the gaps between the shell fragments.
This was painted out with artists acrylic paints.
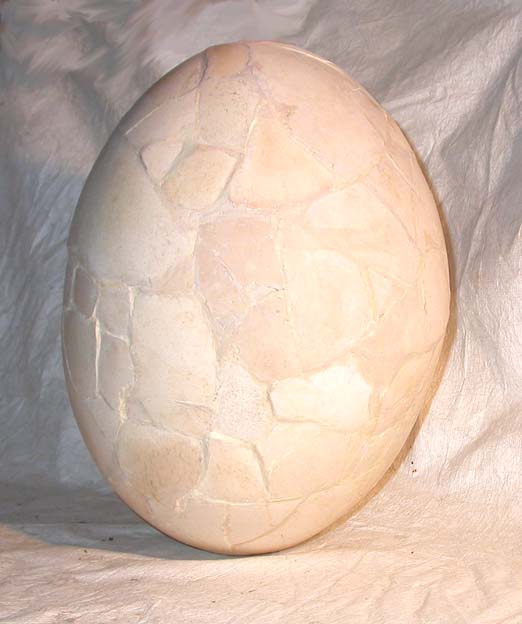
The clean rebuilt egg.
For more details about what we can do for you, or for a quote, please
contact:
enquiries@natural-history-conservation.com
We
are members of the United Kingdom Institute for Conservation of Historic and
Artistic Works