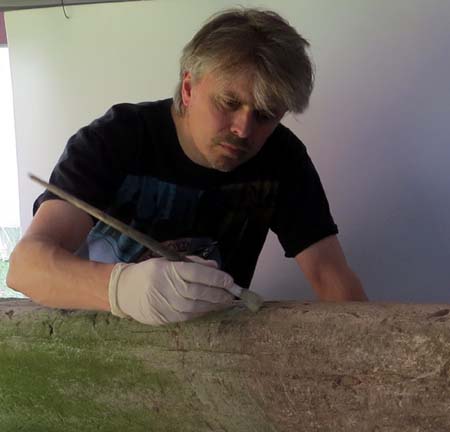
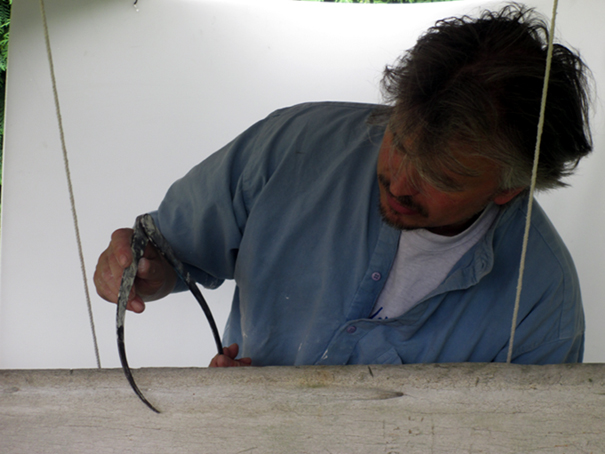
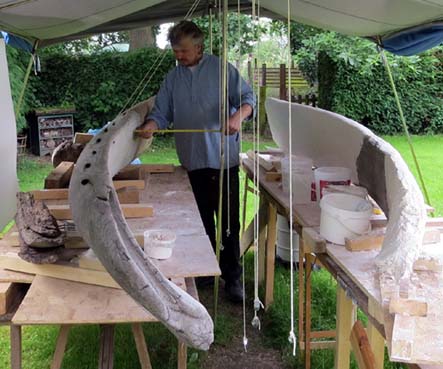

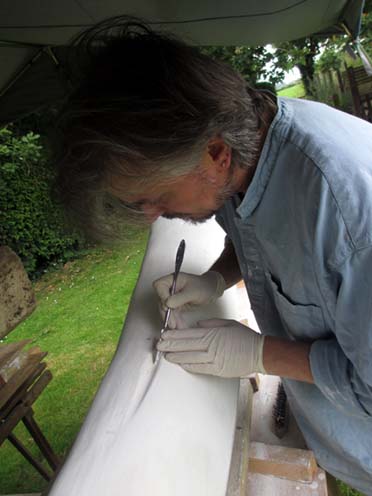
Above: Cleaning the bone, measuring it and making the reversed model.
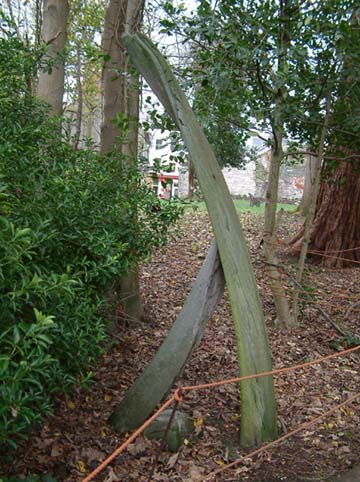
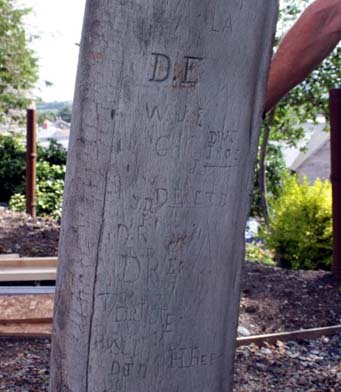
 Most arches in the British Isles made from the bones of whales utilise the two large lower jaw bones, as is the case with this large whalebone arch in the gardens of Cardigan Castle in Wales. Most often, these were lower jaw bones of a Greenland Right Whale (Balaena mysticetus), a baleen filter feeder that lives in Arctic and sub-Arctic waters and grows up to 20m long, weighing up to 75 tonnes. The jaw bones could be up to five metres long though up to a metre would sometimes be buried in the ground when upturned and made into arches. It was fashionable to erect such decorative whalebone arches in the 18th century but the practice continued into the early 20th century. For more information, see ‘Whales Bones of the British Isles’ by Nicholas Redman.
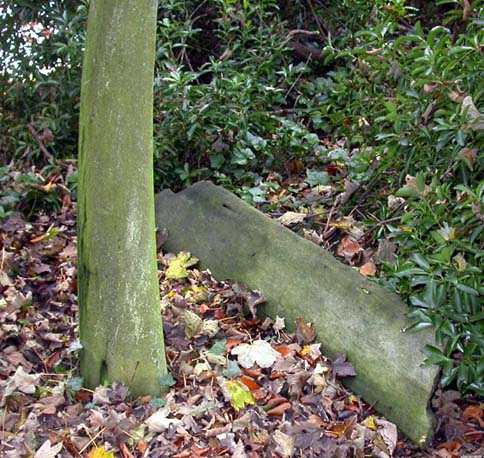
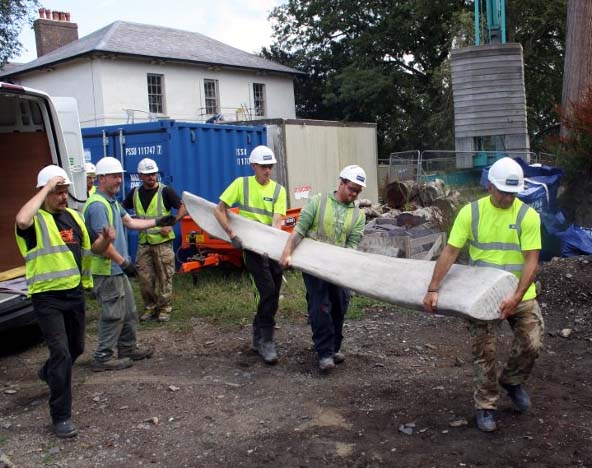
 The complete bone and all the pieces of the other side of the arch were taken away for cleaning and conservation, transported safely on foam mattresses in the back of a van. All the pieces were gently cleaned with soft brushes and a vacuum cleaner, and small dental picks and tweezers where necessary. Not scrubbing them with water but keeping them dry. All the dirt and soil was removed, as well as the moss, lichen and algae etc. They all look much cleaner. The hole in the base of the complete bone, the ‘marrow cavity’, was full of small roots which went up through the middle of the bone for about 3 feet and then exited out of some of the blood vessel holes.

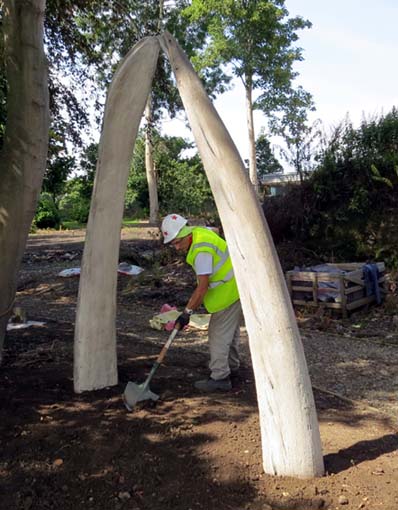
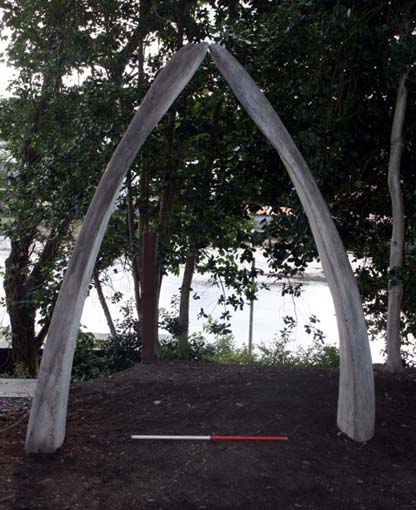
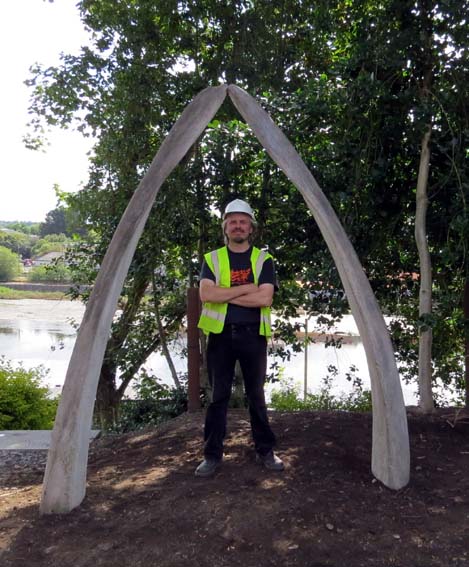 Re-erection of the arch:
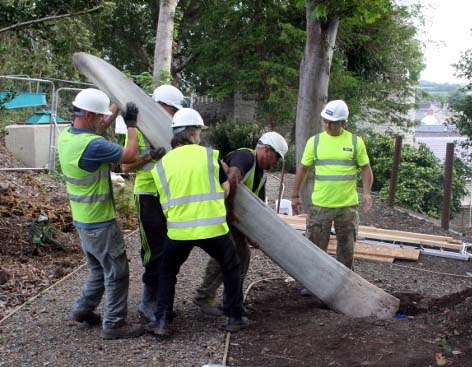
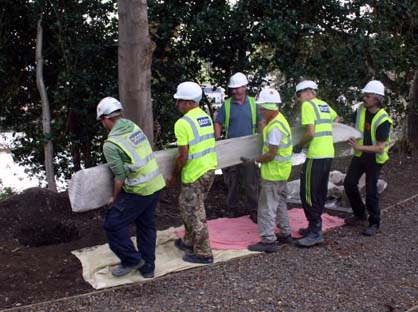
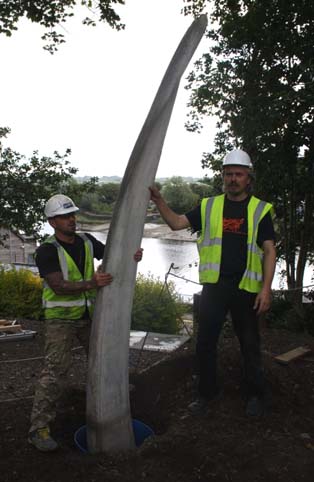
The complete bone and all the broken pieces plus the new cast and the mould were all transported back to Cardigan Castle on foam mattresses. Holes were dug an appropriate distance apart (measurements had been taken before the original bone was moved) and to the right depth. A wide protective plastic tube (the upper half of a water butt) was placed into the hole for the real bone, to help reduce the chances of root damage, before the bone was placed into position. It takes at least 3 people to safely carry the heavy bone, and to carry the cast which is a similar weight. The tough Jesmonite resin should not be so easily damaged by roots so a plastic tube was not used in this hole. Some time was taken to make sure that the bones came together at the right angle at their apex, and that they did not lean forwards or backwards too much. Then, soil was placed back into the holes around the bone and around the cast, and was securely tamped-down with a large sledgehammer. This tamping-down should be repeated a few times over the next month or so as the bones and the soil settle. The bones were secured at their apex by drilling through both bones and inserting a threaded bar, secured with washers and nuts at both ends.
The bones should be visually checked and given a little push in each direction to see if they move once in a while. However, their bases are so heavy and they are planted so deeply in to the ground that they really should not shift or be of any danger to anyone at all, even if people really try their hardest to push them over. To get them to move more than a fraction you would need a spade, plenty of time and some determination.
Re-erection of the arch:
The complete bone and all the broken pieces plus the new cast and the mould were all transported back to Cardigan Castle on foam mattresses. Holes were dug an appropriate distance apart (measurements had been taken before the original bone was moved) and to the right depth. A wide protective plastic tube (the upper half of a water butt) was placed into the hole for the real bone, to help reduce the chances of root damage, before the bone was placed into position. It takes at least 3 people to safely carry the heavy bone, and to carry the cast which is a similar weight. The tough Jesmonite resin should not be so easily damaged by roots so a plastic tube was not used in this hole. Some time was taken to make sure that the bones came together at the right angle at their apex, and that they did not lean forwards or backwards too much. Then, soil was placed back into the holes around the bone and around the cast, and was securely tamped-down with a large sledgehammer. This tamping-down should be repeated a few times over the next month or so as the bones and the soil settle. The bones were secured at their apex by drilling through both bones and inserting a threaded bar, secured with washers and nuts at both ends.
The bones should be visually checked and given a little push in each direction to see if they move once in a while. However, their bases are so heavy and they are planted so deeply in to the ground that they really should not shift or be of any danger to anyone at all, even if people really try their hardest to push them over. To get them to move more than a fraction you would need a spade, plenty of time and some determination.
For more details about what we can do for you, or for a quote, please
contact:
enquiries@natural-history-conservation.com
We
are members of ICON, the Institute of Conservation